Before you can begin setting up and sending emails, you must configure the email function. For more information, see the section entitled Configuring Email Settings for Notifications. Also, you must define the content of these items is described in the section entitled Email Headers and Footers.
For email notifications, for each kind of service notification, you can select the header, footer, subject line, and greeting to automatically populate emails. To do so:
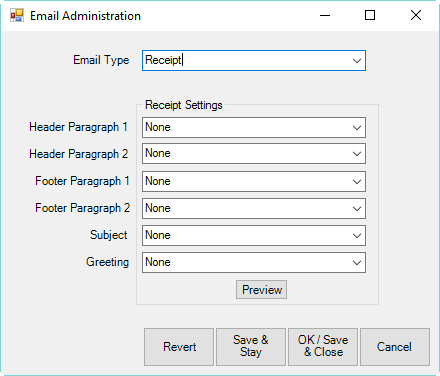
1. Select Administrative ► Notifications ► Email Administration. The Email Administration window will appear.
2. Select the email notification type from the drop-down window:
•Receipt
•Repair Done
•Custom Job Done
•Appraisal Done
•Special Order Done
•Wish List Saved
•New Appointment
•Today's Appointments
•Wish List Being Emailed.
3. For each of header, footer, subject, and greeting, select the content as desired (the content for each of these must be created as described in the section entitled Email Headers and Footers and the section entitled Email Subjects and Greetings).
4. Select Preview to see how the resulting email will appear.
5. Go back and make changes as needed.
6. Select OK/Save and Close.