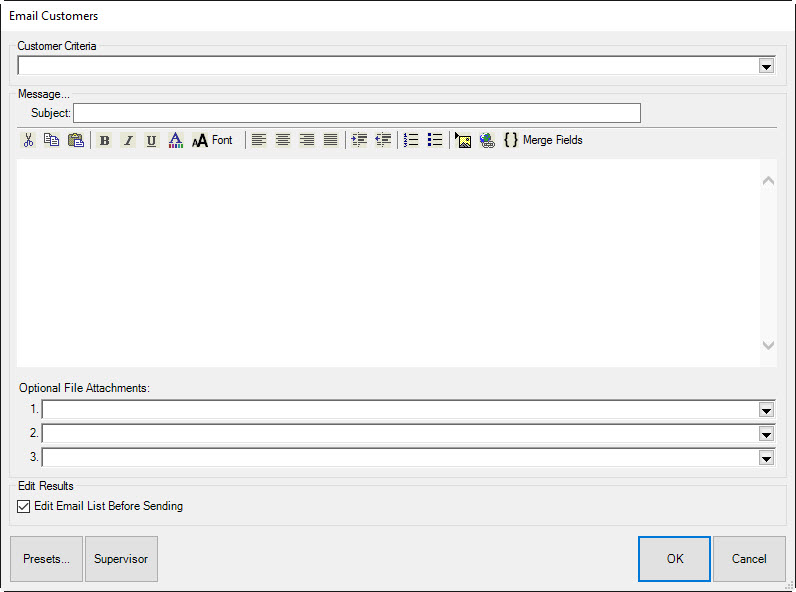
The Edge sends out emails to all of your customers at once. This mass email function uses your own email address and server to send these emails, so you must have a valid email account to use this feature. Check with The Edge Support Team for email account compatibility with this feature. For a video tutorial about working with customer filters, go to http://www.screencast.com/t/MkdH1e7iQmqR.
To setup mass email functionality:
1. Select Email from the Customer function menu.
2. Select Supervisor ► Outbound Mail Settings.
3. Specify your email account settings. You may need to contact your Internet Service Provider (ISP) or email service provider to obtain this information.
4. Select OK to save your settings.
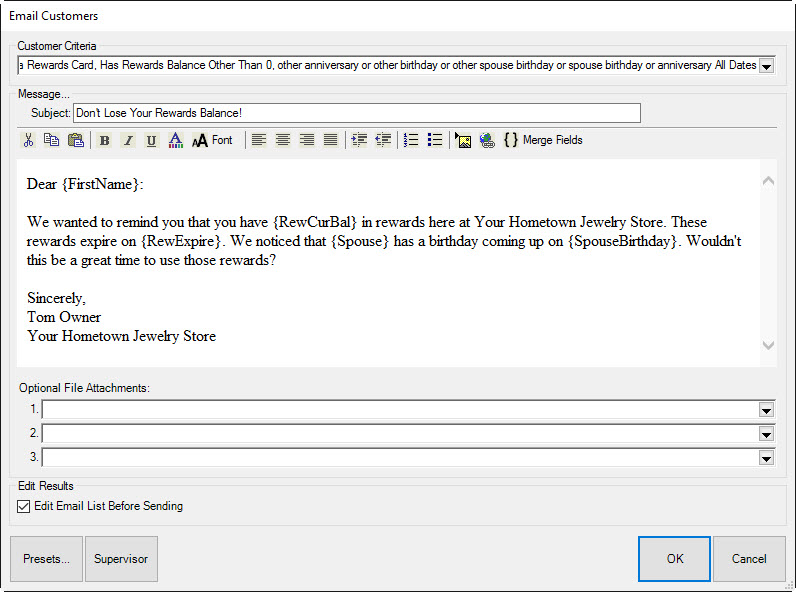
To send out mass emails:
1. Select Email from the Customer function menu. The Email Customers window will appear.

2. Use the Customer Criteria drop-down menu to define a filter for those customers to whom you wish to send your email.
3. Specify the subject of your email.
4. Write the body.
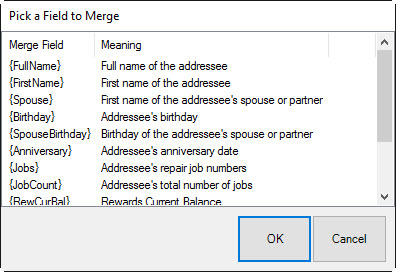
5. Use the { } Merge Fields option to insert variables that will behave like a mail merge when you send the email. The Edge will pull this data from the customer record and populate the email body.

Available merge fields include:
|
FullName |
Full name of the customer. |
|
FirstName |
First name of the customer. |
|
Spouse |
The customer's spouse's name. |
|
Birthday |
The customer's birthday. |
|
SpouseBirthday |
The customer's spouse's birthday. |
|
Anniversary |
The customer's wedding anniversary. |
|
Jobs |
The envelope numbers belonging to the customer. |
|
JobCount |
The number of service jobs associated with the customer. |
|
RewCurBal |
The customer's current rewards card balance. |
|
RewAccru |
The date to which rewards will accrue. |
|
RewExpire |
The date the rewards balance expires. |
|
RewTier |
The rewards tier to which this customer is assigned. |
6. Write the contents of the email, inserting merge fields where needed. An example might appear as follows.

|
|
•You can directly edit the HTML code of a customer email by right clicking in the body and selecting View Source. •To insert an image, right click in the body and select Insert Image. |
7. Select any attachments. This can include images, local files, or something with a URL.
8. Select OK to generate a list of matching customers. Select those you wish to email and select OK to send out the email.