Found in both new and existing purchase order records, the Purchase Order Settings option allows you to choose information that should appear when printing a purchase order. To work with purchase order settings:
1. From the purchase order record, select PO Settings. The Purchase Order Settings window will appear with the Shipping Info tab open.
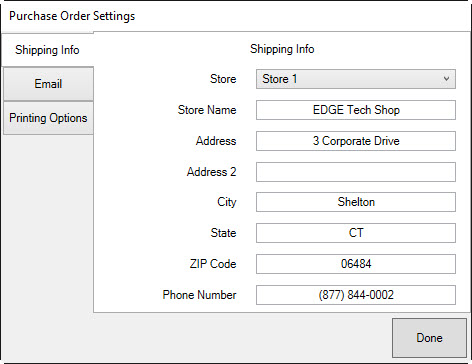
The Shipping Info tab allows you to change the store to which the order should be sent. Fields are self-explanatory and are populated from your Edge license file.
2. Make changes as needed and select the Email tab.

Fields in the Email tab are treated as follows:
|
Store Email Address |
Obtained from your Edge license file. This cannot be changed. |
|
To Email Address |
Obtained from the purchase order vendor email field. If it is not on the purchase order, it will be pulled from the vendor record. This is needed to submit by email. |
|
From Email Address |
This is the store email address unless otherwise specified in the System Option Purchase Order Email Address. |
|
CC Email Address |
Allows you to add a carbon copy email to a third party. To use more than one, separate them with a semi-colon (;). Default addresses can be set in System Options. |
|
BCC Email Address |
Loaded from the System Option Purchase Order BCC Email Address. To use more than one, separate them with a semi-colon (;). It can be changed here. Default addresses can be set in System Options. |
|
Delivery Receipt |
If the recipient's email system supports it, this will generate a receipt of delivery. This is saved to the Most Recent Settings. |
|
Read Receipt |
If the recipient's email system supports it, this will generate a read receipt. This is saved to the Most Recent Settings. |
3. Make changes as needed in the Email tab and select the Printing Options tab.

The Printing Options tab allows you to decide what should appear on the actual purchase order in either email or print format. These options are saved for future use. Items you can include are:
•Print Images
•Print Vendor Account Number
•Print Vendor Phone Number
•Print Vendor Fax Number
•Print Vendor Email address
•Print Retailer Phone Number.
4. Complete these options and select Done.