To find and manage appraisals:
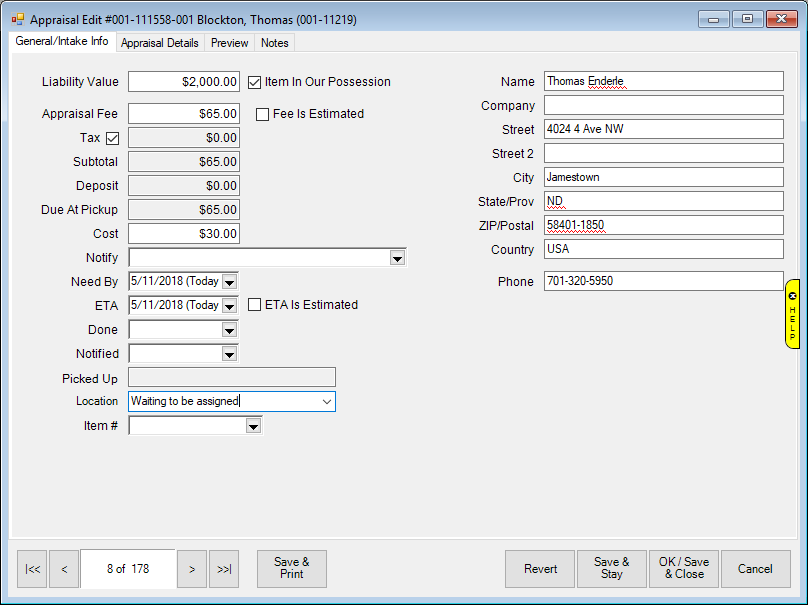
1. Select Find ►Appraisal from the Services menu. The Find Appraisals window will appear.
2. Filter for the appraisal with which you wish to work.
3. Open the desired appraisal record. The Appraisal Edit window will appear with the General tab selected.

4. Edit fields as needed.
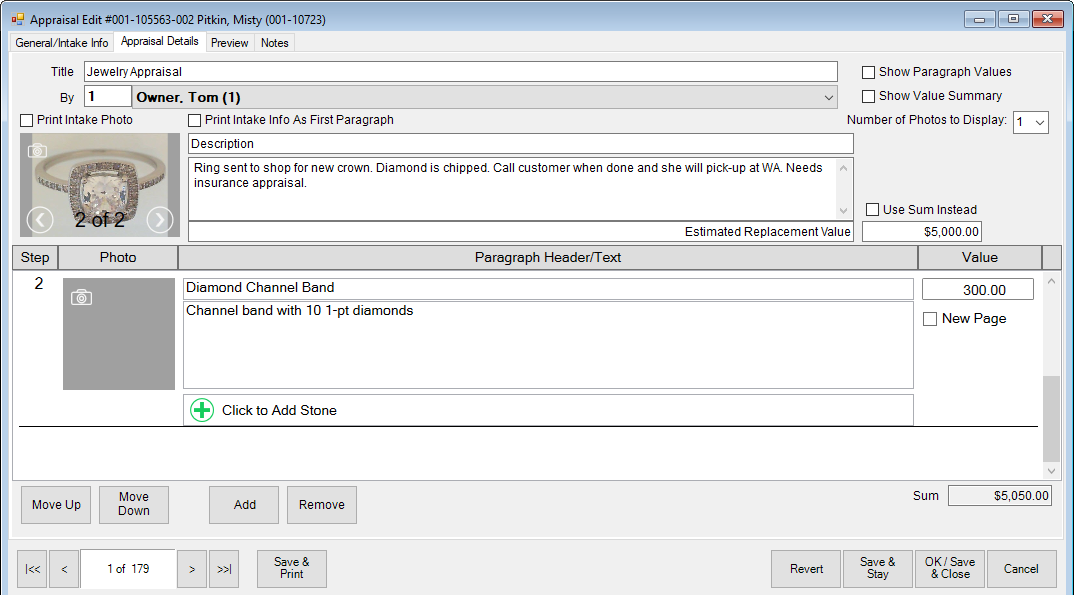
5. Select the Appraisal Details tab.

Fields and options in the Appraisal Details tab include:
|
Title |
The title of the appraisal document. |
|
By |
Associate or vendor who will conduct the appraisal. |
|
Show paragraph Values |
Show these values on the appraisal document. Must be included for appraisal to show the details of the item. |
|
Show value summary |
Show the value summary listing on the appraisal document. Must be included for a total value to appear on the appraisal. |
|
Print Intake Photo |
Include the photo taken at intake on the appraisal document. |
|
Print intake info as first paragraph |
Include information taken about the item as the first paragraph of the appraisal document. |
|
Photo |
Take a photo of the item at this time. See the section entitled Photographing an Item for more information. |
|
Description |
The paragraph title to follow on the appraisal document. The following field contains space in which to write the description. |
|
Use Sum Inst |
Rather than specifying an appraised value, use the sum of the part values. |
|
Step |
Lists the step number listed. |
|
Photo |
Shows a photo of the step. |
|
Paragraph Header/Text |
The paragraph title and text describing the step. |
|
Value |
The value of the step. |
|
New Page |
When checked, starts the paragraph on a new page in the generated appraisal document. |
|
Sum |
The total value. |
6. For each item in the lot, or for each aspect of the item to be described, select Add. A line item will appear on the Appraisal Edit window.
7. Enter a name for the paragraph.
8. Enter the text describing the item or aspect.
9. Enter the value.
10. Enter as many items or aspects as needed by repeating steps 5 through 9.
11. Rearrange the order in which the paragraphs appear by selecting Move Up or Move Down.
12. Edit or complete these as desired and select the Preview tab.

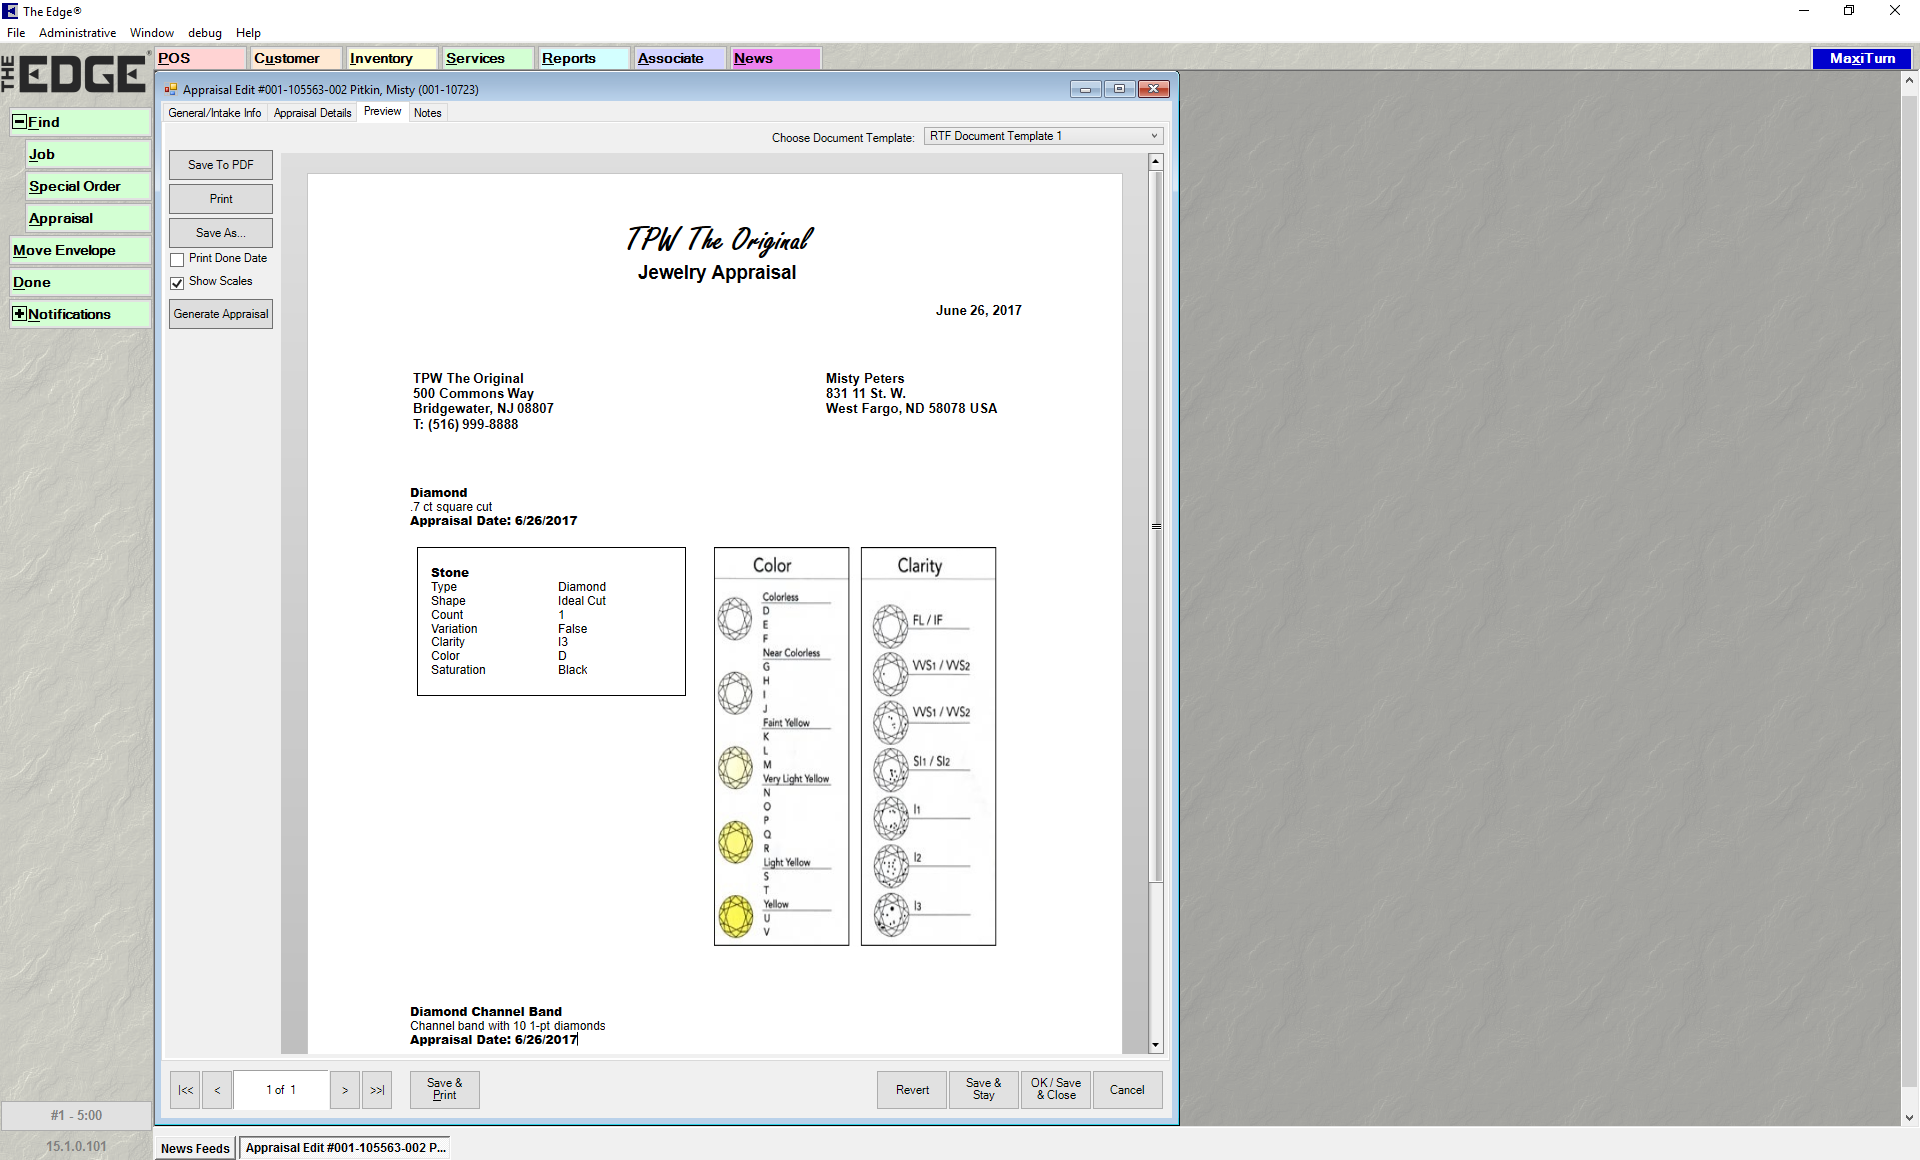
The Preview tab shows an approximate print preview of the appraisal. The Edge comes loaded with five appraisal templates, one default and four alternates. Based on the locations you set in System Options, your chosen default template will be used automatically. Other available templates will appear in the drop-down menu.
Options in the Preview tab include:
|
Choose Document Template |
Select the desired appraisal template, if not the default. If you do not see a list of templates, check your System Options; there should be a value in Appraisal Template Folder Location. |
|
Save to PDF |
Save the appraisal as it appears so far to a PDF file. |
|
|
Print the appraisal as it appears so far to paper. |
|
Save As |
Save the appraisal as an .rtf. |
|
Print Done Date |
When printing, The Edge can print the current date on the appraisal or the date the appraisal was completed. This option indicates that you want the completion date printed. |
|
Show Scales |
If there is a diamond, the appraisal will include a graphical guide of color and clarity for reference. |
|
Generate Appraisal |
Refreshes the preview to reflect changes in settings. |
13. To select a different appraisal template, select one from the Choose Document Template drop-down menu. Note that if you are editing an existing appraisal, the template you used before will be used unless you select a different one.
14. Select the appropriate save option from the Record Navigation Bar.
15. To see a preview of the actual printout, select Print Preview.
16. To retain the appraisal completion date on the printed copy, select Print Done Date. Otherwise, the current date will appear.
17. To print the document, select Print from the Preview tab. We recommend printing to the report printer.
18. Use the Notes tab to record any unofficial information about the appraisal or the pieces included in it.