To create a new collection:
1. From the Inventory menu, select Items ► Collections ► Add. The New Collection window will appear.
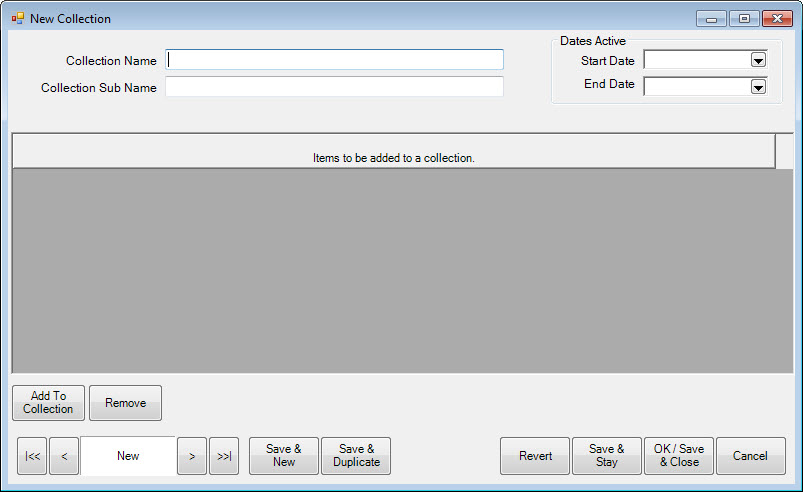
Fields and options in the New Collection window include:
|
Collection Name |
The name for the collection. |
|
Collection Sub Name |
The name for a sub-collection, if desired. |
|
Start Date |
The date the items in the collection will begin to pop-up at point of sale. If this is left blank, the collection will start immediately. |
|
End Date |
The date the items in the collection will cease to pop-up at point of sale. If this is left blank, the collection will continue indefinitely. |
|
Add to Collection |
Used to add an item to the collection. |
|
Remove |
Removes the item from the collection. It does not change the inventory status. |
2. Enter a name for the collection.
3. Enter a name for the sub-collection, if desired.
4. Use the date pickers to select a start and end date for the collection if desired. If the end date needs to be extended, or is you wish to reactivate the collection, change these dates as needed.
5. At least one item must be added; select Add To Collection. A collection line item will appear.

6. Locate the desired vendor using the Vendor drop-down menu.
7. Locate the desired style number using the Style drop-down menu. Alternatively, use the Find Item option to locate an item using the Item Find feature.
|
|
To quickly enter items into the collection, scan them in. |
8. Repeat as needed to add all the items to the collection.
9. Select OK/Save & Close. The items can now be found when searching by collection using the Item Find feature. Also, the collection items will now appear as suggestions at point of sale, provided System Options are set accordingly.
